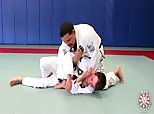
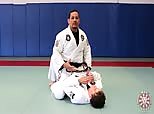
Mount Attack Series 7 - Technical Mount Transition and Control
Add to Favorites Remove From Favorites 2216 3830 days ago
In this lesson we learn to control our opponent using the technical mount when we are late to the respond to their hip bump escape. In this case we transition to the technical mount to maintain control and can still look to attack our opponent with submissions with an armbar and collar choke combo from the technical mount
Mount Attack Series 3 - Controlling the Mount Position
Add to Favorites 2595 Remove From Favorites 3835 days ago
In this third lesson we learn how to position ourselves to control our opponent once we have already established the mount. We learn two specific variations of the mount to control your opponent, the high and low mount.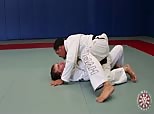
Mount Attack Series 2 - Transition to Mount from Side Control via Knee on Belly
Add to Favorites 2159 Remove From Favorites 3836 days ago
We continue our series of mount attacks by examining another way to get tot he mount. In this lesson we learn another way to establish the mount from side control by transitioning to knee on belly before going to the mount.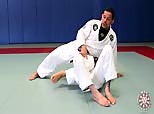
Mount Attack Series 1 - Establishing the Mount from Reverse Kesa Gatame Side Control
Add to Favorites 2785 Remove From Favorites 3837 days ago
We begin this series on how to attack from the mount by first discussing how to get to the mount from side control. In this lesson we learn how to establish the mount from the reverse kesa gatame position.
Inside the University 100 - Failed Straight Armlock to Folded Side Control with Transition to Mount, Folded Straight Armlock, or Kimura
Add to Favorites 1569 Remove From Favorites 3913 days ago
In this lesson we learn how to continue our attack with a failed straight armlock where your opponent was able to free their hand and bring it to the other side of your head. Rather than let go of your grip on your opponent's arm, we use this opportunity to transition to a side control with your opponent's arm folded across and pinned to their chest. We have many options to finish from the folded side control position including a transition to the mount, a straight arm lock from the folded side control, or transition back to the keylock to attack the kimura, straight armlock, and americana.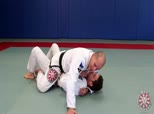
Controlling the Mount
Add to Favorites 2427 Remove From Favorites 3954 days ago
The mount is one of the highest scoring positions in competition jiu jitsu along with the back position because it is a dominant position that allows you to attack your opponent when your opponent is unable to pose a physical threat from underneath the mount. Xande teaches some of the fundamental concepts on how to control your opponent once you have mounted them including how to position your weight and how to transition to control your opponent even when they attempt to escape.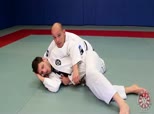
Side Control Transition to the Back with Near Side Hook or Garcia Roll when Opponent Rolls Away
Add to Favorites 2556 Remove From Favorites 3960 days ago
In this lesson we learn how to transition to a back take when your opponent rolls away from you and you were unable to stop their movement. Sometimes it is better to make a transition instead of trying to force our opponent pinned to stay one step ahead of them. We learn to take the back using the near side hook or with the far side hook with the Garcia Roll when your opponent turns away and attempts to make a running escape from your side control.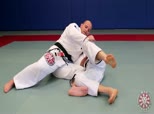
Options to Transition to Mount from Hip to Shoulder Side Control
Add to Favorites 2336 Remove From Favorites 3961 days ago
Xande continues his series on how to transition to the mount from the side control from the reverse kesa gatame (hip to shoulder side control). In this lesson, we learn three classic ways to get our leg across to establish the full mount position.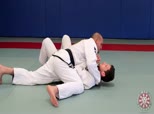
Hip to Hip Side Control Transition to the Mount via Knee on Belly
Add to Favorites 2515 Remove From Favorites 3962 days ago
Xande teaches one of the most common and fundamental ways to transition from side control to the mount position. In this lesson we start from the hip to hip side control and bring our knee along the line of our opponent's belt to transition all the way to the mount.
Inside the University 65 - Failed Back Control to Mount Transition and Mount to Back Transition
Add to Favorites 1212 Remove From Favorites 4029 days ago
Xande teaches the failed back control to mount and mount to back transition. We learn a key detail to cross your leg across your opponent's hip and establish a katagame grip with your arm to transition from the back to the mount without giving your opponent an opportunity to escape.
White Belt University 6.6 Transitions - Side Control to Mount and Mount to the Back
Add to Favorites 1610 Remove From Favorites 4092 days ago
Saulo teaches how to mount your opponent from side control as well as how to go from the mount position to your opponent's back.