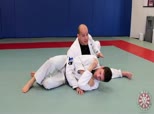
Side Control Transition when Opponent Rolls In with the Spinaround to Side Control or Backtake
Add to Favorites 3561 Remove From Favorites 3787 days ago
Your opponent may bridge and roll in to you as you're passing the guard or find a way to bridge into you to break the pin from side control. If your opponent is already on their side, it may be hard to re-establish control of the position. Rather than letting them reestablish their guard, spin around to the back side instead to reestablish your side control or to transition to the back.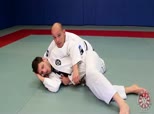
Side Control Transition to the Back with Near Side Hook or Garcia Roll when Opponent Rolls Away
Add to Favorites 2551 Remove From Favorites 3788 days ago
In this lesson we learn how to transition to a back take when your opponent rolls away from you and you were unable to stop their movement. Sometimes it is better to make a transition instead of trying to force our opponent pinned to stay one step ahead of them. We learn to take the back using the near side hook or with the far side hook with the Garcia Roll when your opponent turns away and attempts to make a running escape from your side control.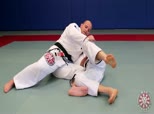
Options to Transition to Mount from Hip to Shoulder Side Control
Add to Favorites 2336 Remove From Favorites 3789 days ago
Xande continues his series on how to transition to the mount from the side control from the reverse kesa gatame (hip to shoulder side control). In this lesson, we learn three classic ways to get our leg across to establish the full mount position.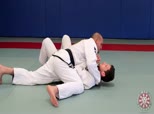
Hip to Hip Side Control Transition to the Mount via Knee on Belly
Add to Favorites 2515 Remove From Favorites 3790 days ago
Xande teaches one of the most common and fundamental ways to transition from side control to the mount position. In this lesson we start from the hip to hip side control and bring our knee along the line of our opponent's belt to transition all the way to the mount.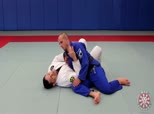
JJU 8-04 to 8-06 Escaping Kesa Gatame, Reverse Kesa Gatame, and Wrestler's Pin
Add to Favorites 1839 Remove From Favorites 4022 days ago
Saulo teaches how to escape three variations of side control when your opponent pivots to his side to control you in the kesa gatame (also known as the scarf hold), reverse kesa gatame, and the wrestler's pin where your opponent controls you with the farside underhook.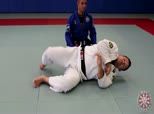
JJU 8-03 Side Control Running Escape
Add to Favorites 1665 Remove From Favorites 4023 days ago
Saulo explains that it may not always be possible to escape using the traditional side control escape if your opponent is using his hands to block off one side with a same-side crossface and hipblock. In this situation, the running escape may be the key to escaping side control to a neutral position.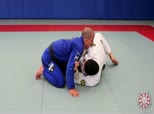
JJU 8-02 Side Control Escape to All Fours
Add to Favorites 1612 Remove From Favorites 4024 days ago
The side control escape to guard and escape to all fours are a combination that go well together. If your opponent prevents you from recovering the guard, transition to the knees instead to continue your escape to a neutral position.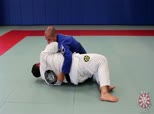
JJU 8-01 Side Control Escape to Guard Recovery
Add to Favorites 1886 Remove From Favorites 4025 days ago
Saulo teaches how to escape the side control position and recover guard to bring yourself back to a neutral position.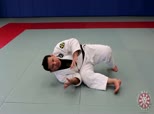
JJU 8-0 Side Control Escape Drills
Add to Favorites 1731 Remove From Favorites 4026 days ago
Saulo teaches two important drills that are key to master in order to escape from side control. Practice these drills often to absorb them into muscle memory.
JJU 4-4 and 8-5 Reverse Kesa Gatame Survival to Reversal or Back Take
Add to Favorites 2915 Remove From Favorites 4090 days ago
This video contains lessons 4-4 Reverse Kesa Gatame (page 38) and 8-5 Escape from Reverse Kesa Gatame (Page 72) from the JJU Book. Rodrigo Pagani teaches how to survive and escape the reverse kesa gatame by using a hip bump reversal or to use the hip bump to take your opponent's back. This lesson is a variation to what is taught in the book as it ends in a reversal or back take but contains the same core concepts and movements as seen in the book. It's important to take preventative measures and to actively block the cross face in order to be able to initiate these escapes.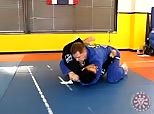
JJU 8-06 Escape against Wrestler's Pin
Add to Favorites 1976 Remove From Favorites 4143 days ago
This video contains how to escape the super man grip in side control. This video contains lesson 8-6 which can be found on page 74 of the JJU book.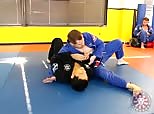
JJU 8-04 Escape from Kesa Gatame
Add to Favorites 1772 Remove From Favorites 4143 days ago
This side control escape video contains lesson 8-4 from page 70 of the JJU book.