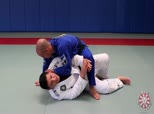
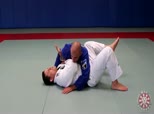
JJU 3-3 to 3-4 Mounted Collar Choke Defense
Add to Favorites 2687 Remove From Favorites 4161 days ago
Saulo explains that you must turn towards the elbow of the attacking arm when your opponent establishes the mount and has one hand in the collar to choke you with the gi. This is a dangerous position because it is highly likely that your opponent will be able to finish a choke if you allow them to settle two collar grips. As soon as they establish one collar grip, immediately turn towards the attacking elbow to nullify the choke and buy some time to make an escape.JJU 5-0 to 5-6 Knee on Belly Survival and Prevention
Add to Favorites 2586 Remove From Favorites 4218 days ago
Saulo explains how to survive the knee on belly and position yourself for an escape. He also explains how to use your sensitive leg to prevent your opponent from getting the knee on belly position from side control.JJU 4-0 to 4-5 Side Control Survival
Add to Favorites 2806 Remove From Favorites 4219 days ago
Saulo explains the appropriate survival posture and hand fighting when you are underneath your opponent in the side control position.JJU 2-0 to 2-5 and 6-4 Surviving and Escaping All Fours Position
Add to Favorites 2649 Remove From Favorites 4220 days ago
Saulo explains the basic survival posture in the All Fours position when your opponent has your back with both hooks in. He explains how to use your hands and how to roll over to your back to begin positioning yourself for an escape.JJU 3-0 to 3-6, 7-1 Mount Survival and Mount Elbow Escape
Add to Favorites 2807 Remove From Favorites 4221 days ago
Saulo explains how to survive in the mount position and how to set up the Mount knee elbow escape to recover your guard.JJU 1-0 to 1-3, 6-0, 6-1 Back Survival and The Scoop Escape
Add to Favorites 4031 Remove From Favorites 4222 days ago
Saulo explains how to position yourself to survive the back, common mistakes from the back position, how to hand fight in the position, and how to set up the basic scoop escape to get your opponent off your back.JJU Introduction to the Back Position
Add to Favorites 1569 Remove From Favorites 4222 days ago
Saulo explains what it means to have your back taken and what defines the back position along with some basic postures that are common in the position.JJU Introduction to Survival
Add to Favorites 1985 Remove From Favorites 4222 days ago
Saulo explains that white belts will often find themselves in survival mode and that survival is defined by protecting yourself to prevent your opponent from advancing in position or submissions.JJU 4-4 and 8-5 Reverse Kesa Gatame Survival to Reversal or Back Take
Add to Favorites 2915 Remove From Favorites 4262 days ago
This video contains lessons 4-4 Reverse Kesa Gatame (page 38) and 8-5 Escape from Reverse Kesa Gatame (Page 72) from the JJU Book. Rodrigo Pagani teaches how to survive and escape the reverse kesa gatame by using a hip bump reversal or to use the hip bump to take your opponent's back. This lesson is a variation to what is taught in the book as it ends in a reversal or back take but contains the same core concepts and movements as seen in the book. It's important to take preventative measures and to actively block the cross face in order to be able to initiate these escapes.JJU 1-1, 1-2, and 6-0 The Scoop Back Escape
Add to Favorites 2282 Remove From Favorites 4263 days ago
Rodrigo Pagani teaches how to hand fight when your opponent has taken your back and initiate the scoop position to escape to a better position. Small details such as the placement of your elbows in your opponent's knee pit before kicking your leg can make a big difference on whether the escape is successful.JJU 1-0 to 1-3, 6-0, 6-1, 6-4 Back Survival & Scoop and Escape
Add to Favorites 3247 Remove From Favorites 4264 days ago
This video contains lessons 1.0, 1.1, 1.2, 1.3, 6.0, 6.1, and 6.4. The topic of these videos include how to survive when your opponent has taken your back, how to posture and position in these situations, and how to escape the back using the scoop.JJU 5-4 & 9-0 Knee on Belly Survival and Escape
Add to Favorites 3053 Remove From Favorites 4314 days ago
This video contains lessons 5-4 and 9-0 on pages 45 and 76 of the JJU book. These knee-on-belly escape lessons cover how to survive when your opponent has their knee on your belly and how to posture yourself to make an escape to a better position.
